Showing posts with label DIY. Show all posts

Sunday, August 21, 2011

DIY Cotton Candy Machine


So using the process above one can make their very own cotton candy machine.

I then thought perhaps a dollar store handheld fan would be a perfect motor:


Take off the blades of the fan and then take an aluminum can and poke holes into it using an awl, or a drill if its something thicker. It doesn't need to be thicker.

Find a plastic bowl that you can use as a container to catch the spun sugar. Most manufactured machines come with a heater, but for DIY machines you don't have to have a heater, just have the apparatus by a stove and melt your sugar in a bowl on the stove and then pour it into the holey container.

Attach the fan holder to a piece of cardboard and test your apparatus!

Oh what glorious centrifugal force brings us! :D

PS: If you buy tonic water and add a little bit of it to the melted sugary mess you might be able to get glowing cotton candy. Tonic water has quinine in it which glows under a black light.


(I hope my mom has her black light bulb still)

Saturday, July 9, 2011

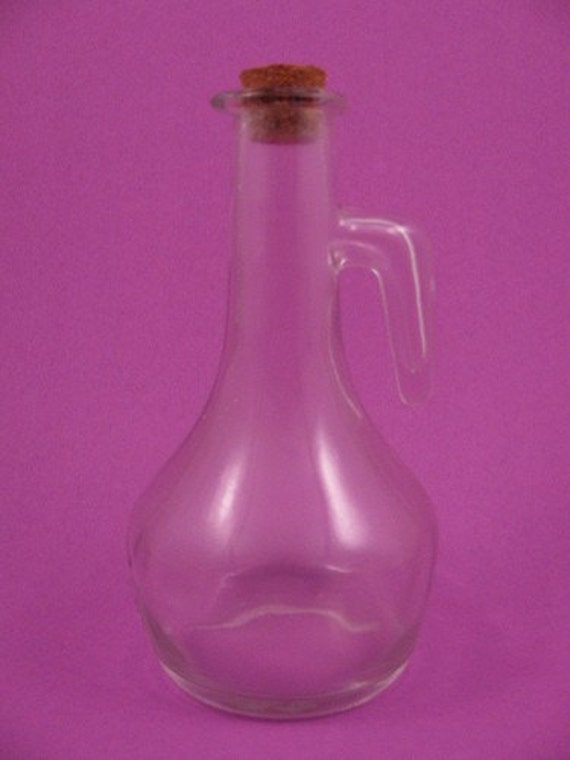
Repurpose vintage bottles with Bottle Pour Spouts


I need to get me some bottle pour spouts. To repurpose vintage bottles use bottle pour spouts. You can use them as water bottles or for any other liquid.


Wednesday, June 22, 2011

Paint Thinner Transfer


Why do I sense that I may need to do this for a package design project in the near future? :P
Gotta make sure to get paint thinner before I go back to school.

Tutorial: http://mademoisellechaos.blogspot.com/2010/04/how-to-transfer-bw-picture-onto-almost.html

Saturday, June 18, 2011

"Papier Mache" Clay


Easy Homemade clay, all you need is newspaper and wallpaper paste.


This is the easiest and cheapest recipe for paper clay.

Steps:

1. Get your newspaper
2. Soak it in water.
3. Tear it into strips. Into a bucket
4. Put more water in it so it just barely covers the paper.
5. Stir it up using a dremmel tool blender, food processor or regular blender.
6. Blend it into a pulp
7. Transfer some pulp into another bucket. Poor more water into the 1st bucket and stir more.
8. Get a cotton (or mesh) bag and put pulp in it and strain it.
9. Take strained pulp and put into the 2nd bucket.
10. Take some wallpaper paste and sprinkle it onto pulp.
11. Stomp/Kneed pulp into a clay.

This technique has been the only technique that uses very little glue.


According to www.wallpaperinstaller.com Cellulose is common binder for a substitute for natural gums and a stabilizer in emulsions as well as a thickening agent. It can be simply created using NaOH (Sodium hydroxide) which dissolves the wood or cotton with an alkali.


Cellulose
"Cellulose methyl ether, produced by treating cellulose from wood or cotton with an alkali, such as sodium hydroxide, followed by methyl chloride. The resulting product is a white granular solid, soluble in cold water but insoluble in hot water. In addition to being used as an adhesive, it is used as a thickening agent, as a substitute for natural gums, and as a stabilizer in emulsions."
-from Bookbinding and the Conservation of Books Dictionary from the Conservation On-Line (COOL) website

"Methyl cellulose occurs as practically odorless and tasteless, white to yellowish-white granules or powder. The pH of a 1% w/v solution is in the range of 5.5 to 8.0. Its angle of repose is about 40 degrees to 50 degrees and it is hygroscopic. It swells and disperses slowly in cold water to form a clear-to-opalescent, viscous, colloidal dispersion. The viscosity is increased with increased concentrations. The viscosity decreases with increased temperatures to about 50 degrees to 60 degrees Celsius, where gel formation occurs. The thermogelation is reversible when the viscous solution reforms upon cooling."
-from Wade A., Weller P.J. (eds) Handbook of Pharmaceutical Compounding.

In paperhanging, cellulose has the highest water content of any paste in general use (around 97%). It usually comes in a small box and is packaged as a white powder. It is mixed with cold water on the job and can be used with a variety of lightweight materials such as porous papers, grasscloth and silk. It's adhesion is mostly of the mechanical type. It leaves very little solids behind and is not suitable for many wallcoverings which require greater amounts of initial tack and holding power.

Rug out of old t-shirts


What does it take to transform a pile of old T-shirts into spectacular works of woven art? Just a spare hula hoop or embroidery hoop and the techniques we'll show you here. The oversize looms and easy-to-use loops of T-shirt fabric make these projects particularly appealing to beginning weavers. Learn the basic hoop weaving technique by crafting a colorful accent rug to brighten up a room. And if you want to take the weaving a little further, check out our basket and chair pad weaves

Before you begin, some terms you need to know: the warp is the material you string on the hoop, the weft is the material you weave with.
Source: http://familyfun.go.com/crafts/hula-hoop-rug-995304/print/

Thursday, June 16, 2011

Family Beach Photo Tiles

These are the tiles I decoupaged for my father for father's day. We have just bought a cape house on Cape Cod. I started going there when I was six months old so Cape Cod has been a big part of my life even though we only go there for a week every summer. We've been going to the same house for every summer since I was six months old. But since my parents are looking to retire soon (after I graduate) they decided to buy a house in Eastham. It is close to the town we used to go to every summer and about 30 an hour away from Provincetown. I thought it would be a nice present to use some of the digital family photos we have kept in archive on the main computer and decoupaged them on to white tiles using scrapbook paper. My town's recycling center has a take it or leave it place for things you want to get rid of. You can find a lot of decent items there. I've gotten frames, and other craft supplies. I found a couple dozen plain white tiles and thought I could probably do something with them. I took them and here is what I used them for... The idea arose when my mom told me the kitchen counter top couldn't hold heat and needed a heat coaster, so I decoupaged six costers for whatever use.

Today I finished them. I used grey felt for the back and furniture feet for the coasters. I still need to put another coat of varnish on them and will do that soon.


Saturday, May 28, 2011

Crackle/Grunge finish


source: http://makethebestofthings.blogspot.com/2010/05/crackle-finish-with-elmers-glue.html

I want to use the above finish. I'm thinking about making furniture out of paper pulp. I can't help but imagine it would have an interesting effect since paper is made from trees.

Here is a "video" of how it is done:


Source: Debbie Wijskamp

Although I think I would have to seal it some how after to keep it from warping.

If I get the furniture looking great out of paper pulp, the next thing I'd like to try is to make a boat of it. Since we're getting a beach house and all, it'll be fun to see if I can pull it off.

Sunday, May 22, 2011

Water Ballon Candle Holders

Source: Water Ballow Luminaries


11 FEBRUARY 2009
by heather
Candletech
has instructions for the coolest candle-making project I have EVER seen! Using balloons filled with lukewarm water, you can make these amazing candle luminaries by dipping balloons in wax. I love the organic shape of the luminaries, and this project looks so fun! They are so elegant, and nobody would ever guess you used dollar store materials for this project! These would be great table decorations for a wedding or other formal occasion, or just pretty to scatter around your home.
The comments section of the tutorial also provides a lot of valuable insight for making this project. Commenters had better luck with 7" or 9" balloons (instead of the water balloons used in the tutorial). Use battery-operated tea lights to avoid melting through the luminaries (the metal-cupped tea lights can possibly get warm enough to melt through), or add sand in the bottom of the luminary to keep the tea light from melting through.
Other commenters suggested adhering something to the outside of the wax to add additional interest (although I just LOVE them as they are!), or using multiple colors of wax in several dips and then carving away to allow different colors to show through.
The project recommends high-melt paraffin wax to avoid the melting

issue when used with tea lights. If you use battery-operated tea

lights, you will avoid this issue and can use other kinds of wax to

make your luminaries. Melt down candles from the dollar store, perhaps? Get beeswax from your local beekeeper or farmer's market?
Project Estimate:

  • Paraffin Wax*, $1 (find at the grocery store in the canning section)

  • Balloons, $1

  • Double boiler, on hand

  • Cookie sheet, on hand

  • Battery operated tea lights, 2 for $1


Total cost: $3

*one commenter said s/he made 15 luminaries out of about 8 lbs of paraffin, so figure about half a pound of wax per luminary. You will likely need multiple blocks of wax from the grocery store to get started.


Instead of using wax, I want to use cold porcelain.